Connecting the Joystick from game consoles to your PC
8- and 16-bit game consoles that were a long time ago very popular, has long lost its leadership in gaming and entertainment market. However, the old games are still popular and yet are perfectly competitive of the interestingness with the modern multi-gigabyte and multi-gigahertz monsters. Today there are many different emulators of old consoles and the Chinese industry is still produced a console itself as well as joysticks to them.
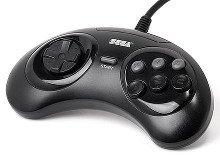
In the Russian magazine "Radio" №1 in 2007 published an article by S.Ryumik about connecting the Joystick from old game consoles to any PC with USB bus. The article contained a circuit an adapter that allows to connect joysticks from NES (SNES, Dendy), SEGA MegaDrive-II or Sony PlayStation consoles. Allowed to connect up to 4 joysticks for NES or up to 2 joysticks for SEGA or Sony PlayStation. The adapter is based on the microcontroller ATMega8-16PI and has a connector for ISP-programmer.
To work with different types and different number of joysticks have a set of 9 firmwares. The minimum response time for 1-joystick firmware is 10ms, for 2-joysticks firmware is 20ms and for 4-joystick firmware is 40ms. Because the device connects to a PC via USB is convenient to use the USB-bootloader for change of firmware. I have built circuit board for SMD-components and added the button S1 that is used to activate the bootloader.
The result is the following scheme:
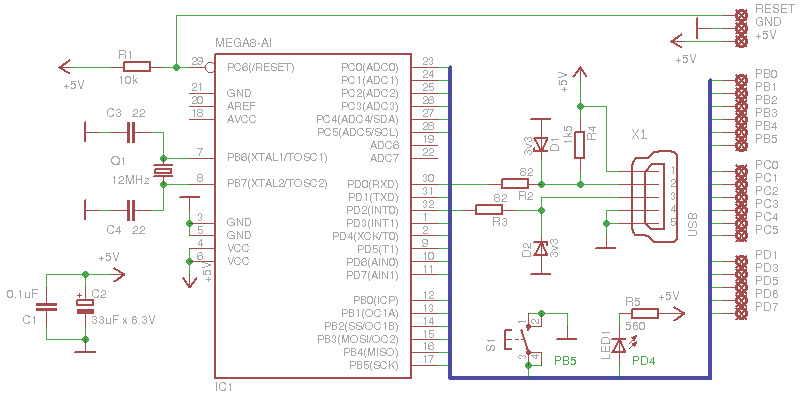
I used the BootloadHID as bootloader.
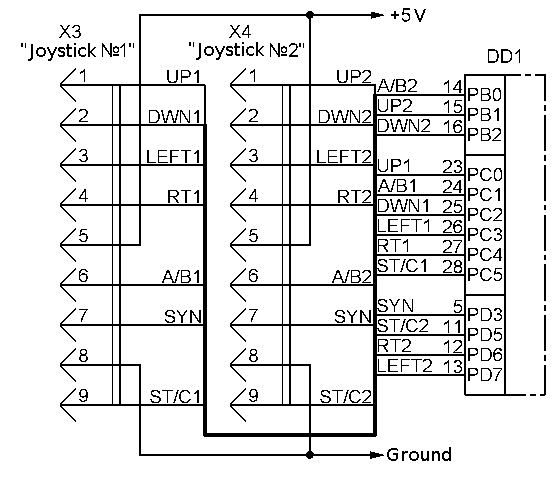
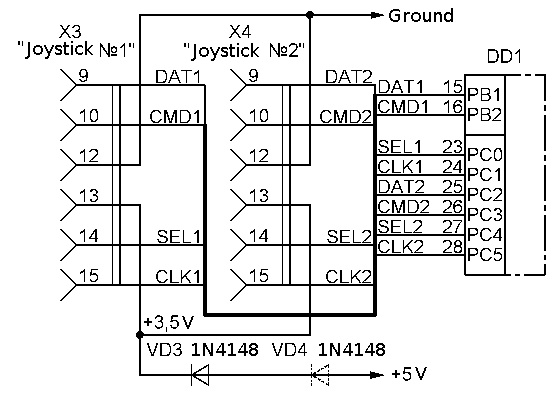
The Circut for connecting of NES-joysticks:
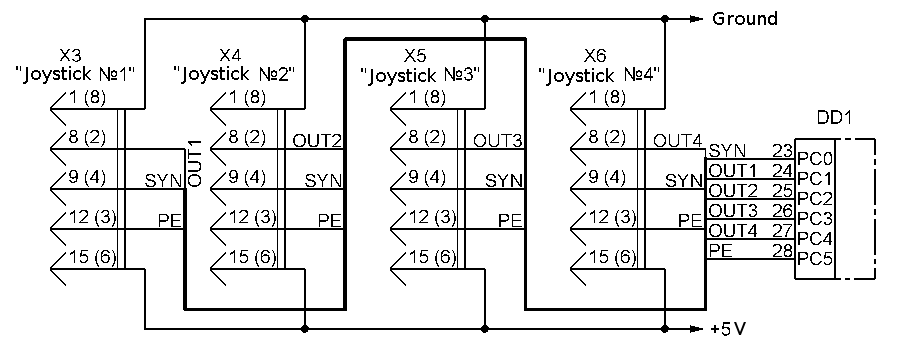
The Circut for connecting of SEGA-joysticks:
The Circut for connecting of Sony PlayStation-joysticks:
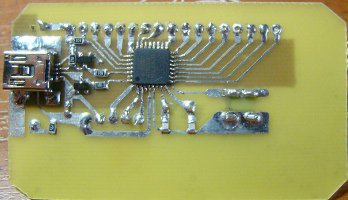
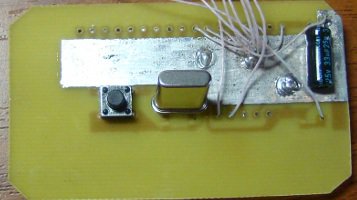
The circuit board:
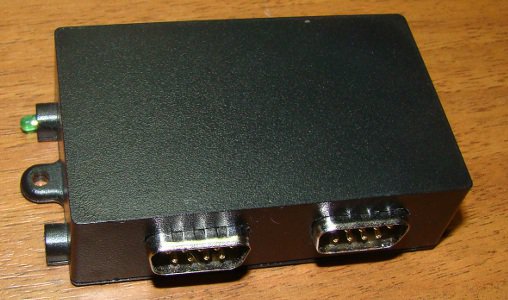
The assembled adapter:
If you use usbasp + avrdude to write fuse bits you can use the following command:
avrdude -pm8 -cusbasp -u -Ulfuse:w:0x2e:m -Uhfuse:w:0xc8:m
Writing bootloader:
avrdude -c usbasp -p atmega8 -U flash:w:bootloader.hex:i
After the successful installation of the loader the programmer does not need. Loading the firmware performed by the command
bootloadHID.exe <firmware filename>
Electronic circuits and PCB layout (for Eagle CAD) can be downloaded from the links below. The original versions of circuts, PCB and firmwares can be downloaded from the ftp server of "Radio" magazine.
Files:
 Firmware, source, Eagle project, bootloader